What if you go to the place of departure every day waiting for them to come home?
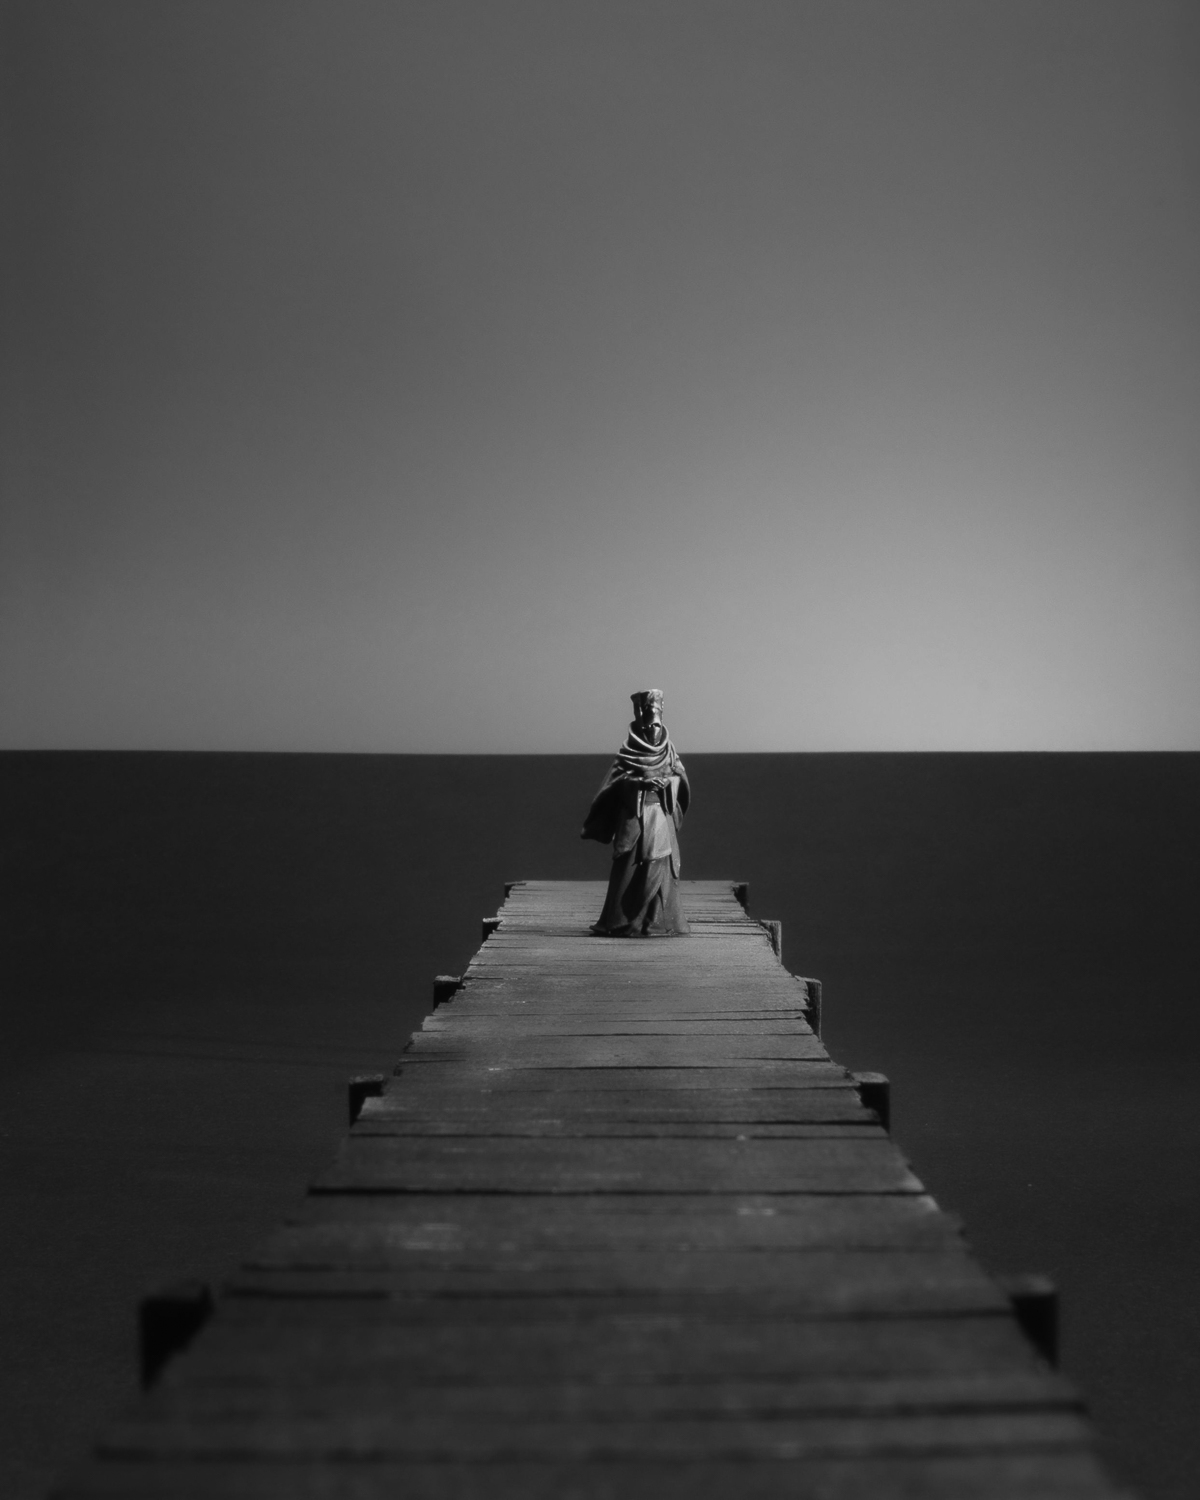
You Never Came Back
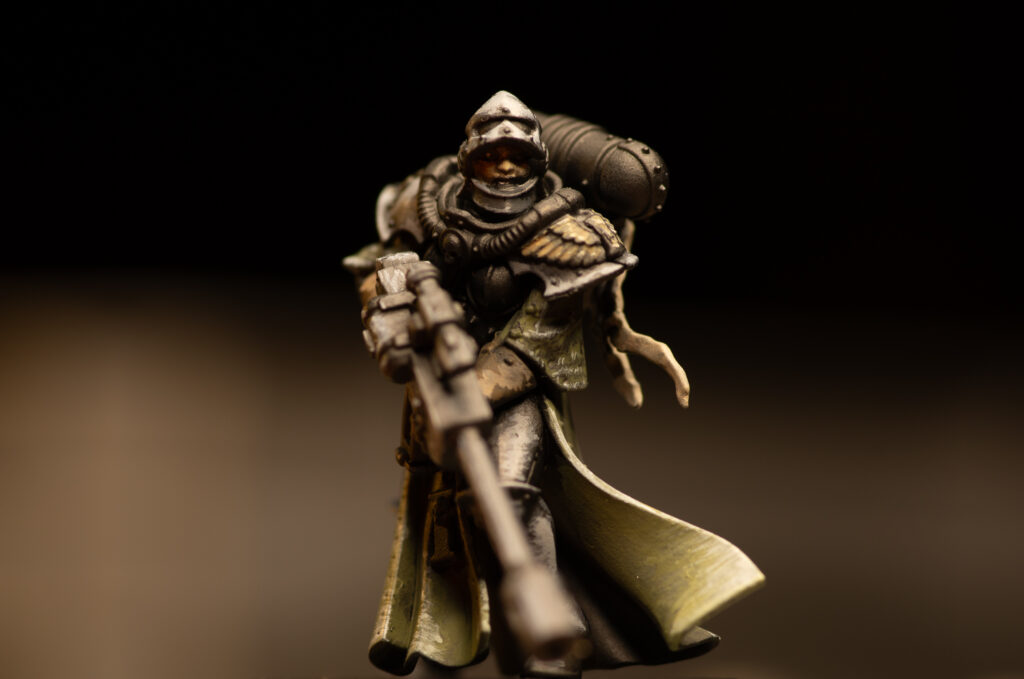
Scene created with a hand painted 3D printed miniature in 28mm scale on a hand crafted pier using cardboard as water and sky. The miniature scale intensifies the unease: a small world frozen at the exact moment before realization sets in. Paint and texture mimic decay, suggesting salt, rot, and long exposure to grief. Nothing moves, yet everything implies what once did. The scene captures the cruelty of hope when it outlives reason—a quiet, sinister stillness where the act of waiting becomes the final connection to those who will never walk back along the pier.
Forced Perspective
The issue with taking photographs of miniatures in miniature terrain is that the terrain won’t stretch to the horizon. It will always stop when the terrain ends which is usually below the eye level horizon when you take the photograph horizontally. A way to hide this is to hide the true horizon behind scenery of any sort. Which can ruin the illusion. In the 28mm scale a terrain piece of 120cm depth would translate to roughly 60m. When you are taking photographs of people outside (as in Long Shots, Wide Shots or Establishing Shots), try to find a spot where your view is blocked everywhere within 60m.
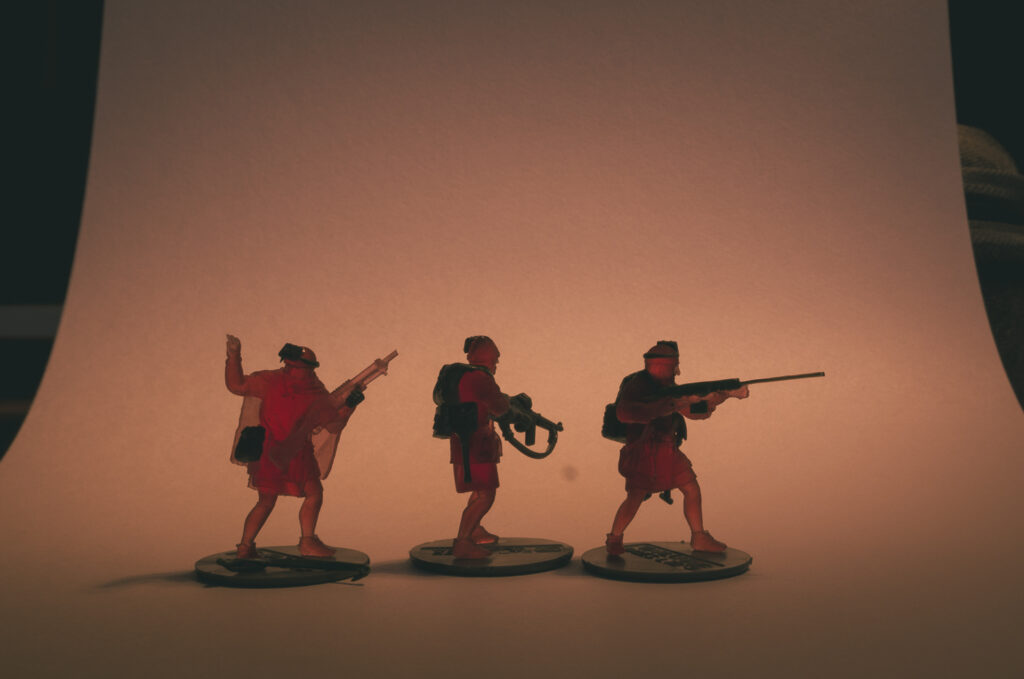
As I wanted to create a scene by the sea I needed a horizon on roughly the miniature’s eye level to create the illusion. It was beneficial that I didn’t plan to have much water texture/ movement in the photograph because I wanted to maximize the negative space around the object.
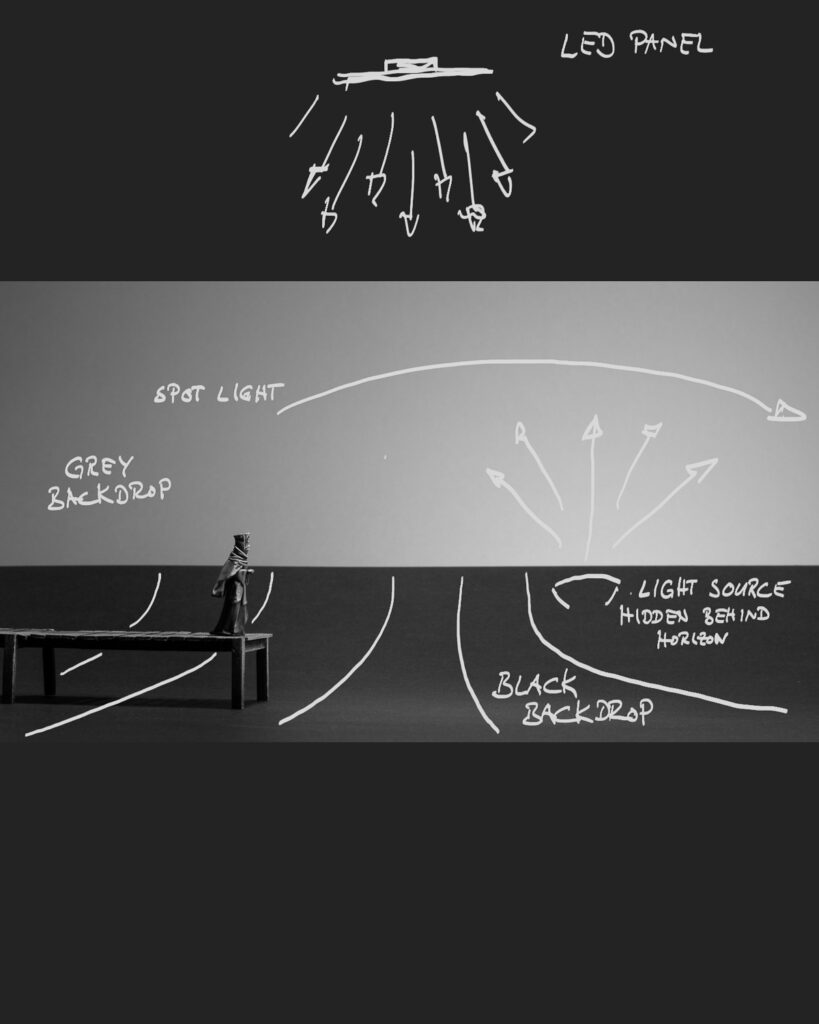
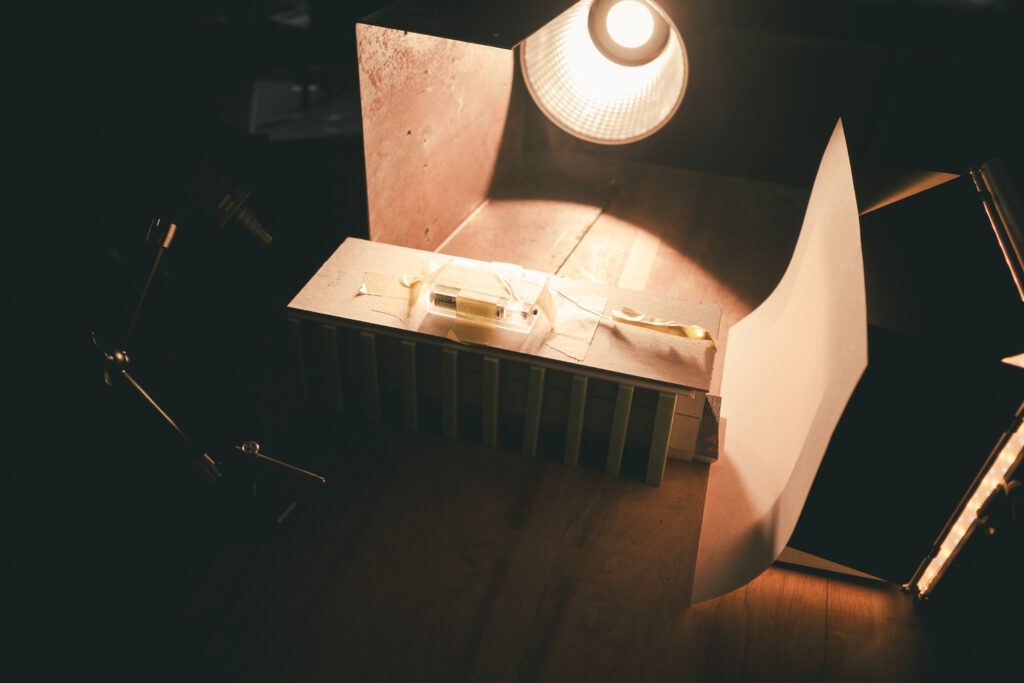
In the end I’ve worked with two paper sheets. A black one which lay flat on the table and which I slightly bent at the far side so that it simulated the horizon. And a grey paper sheet to simulate a cloudless sky.
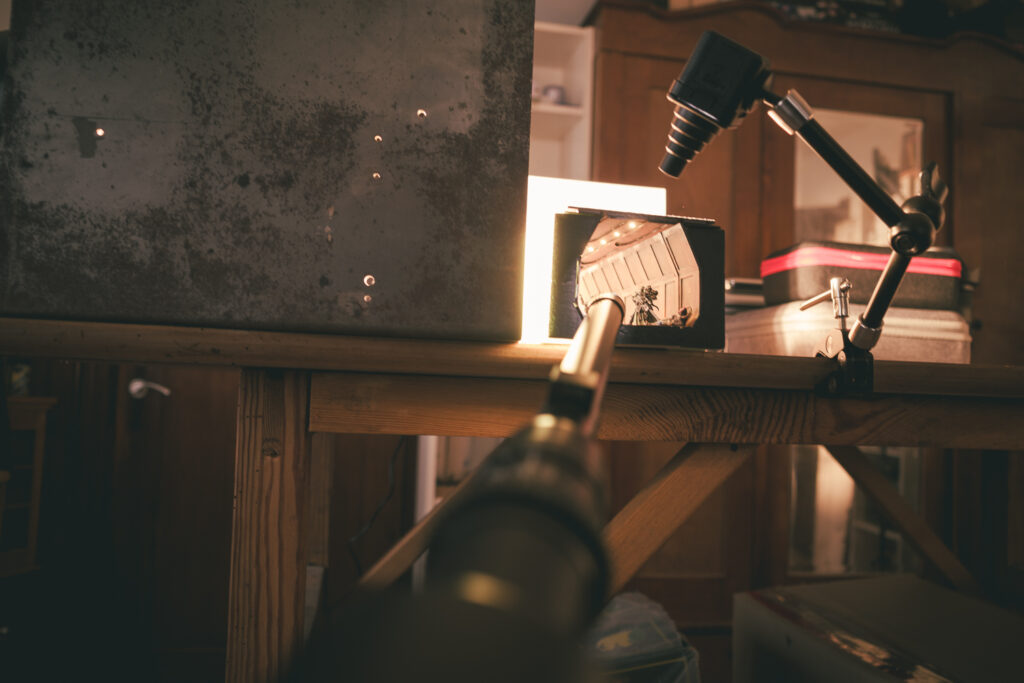
With the help of three lights everything was set up for the photograph.
Simple studio setup
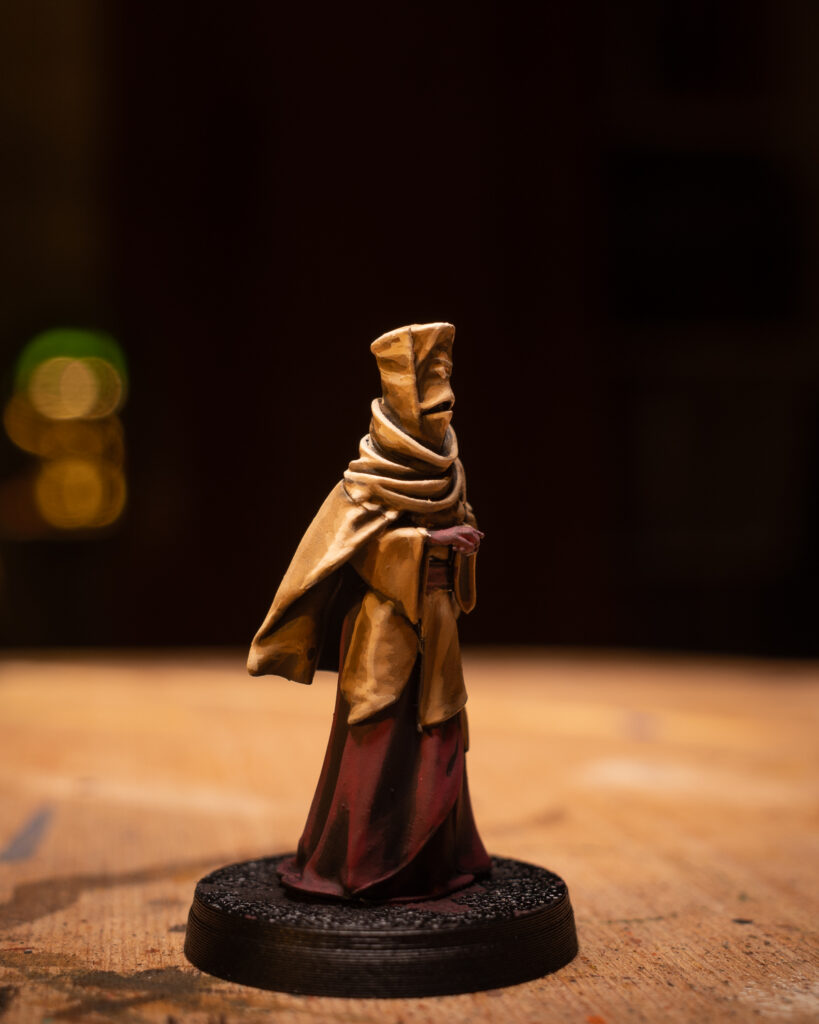
Miniature Design by Rescale Miniatures – painted by me.
For further support you might want to use #craftingforhope whenever you share the campaign.
the inspiration
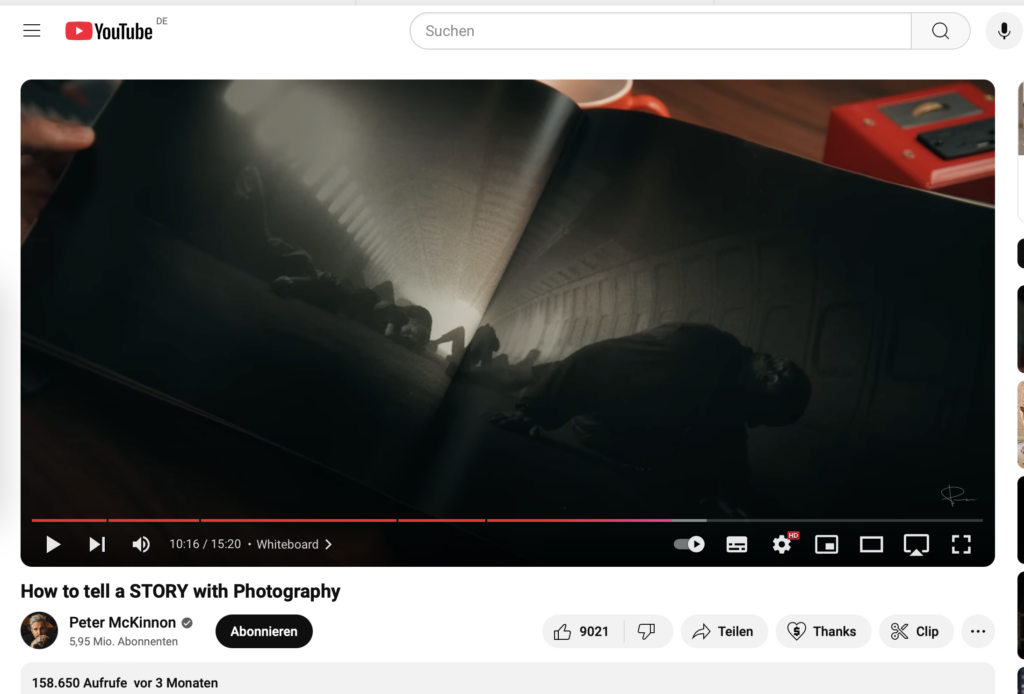
While I was recovering from a surgery I was watching YouTube videos. What happens when you‘ve been watching for too long is that you start scrolling through the feed without finding any new videos of interest. So I’ve watched this Peter McKinnon video. Not that I watch his videos regularly but YT does suggest them as I‘m generally interested in photography content. Anyhow it happened to be about the Widelux camera which provides you with a really interesting perspective due to its super wide angle.
And then he showed a couple of pages of one of Jeff Bridges‘ photo books. When he flipped a specific page and once my brain processed what it saw I was immediately super excited. It was so inspiring that I stopped the video and started searching for the photo on the web.
But it seems that exactly this photo is not to be found. So I searched for the book which is out of press. And I found it. For a price I couldn‘t afford. But I wanted to make a photograph with miniatures inspired by this very photograph made by Jeff Bridges.
In the end my only reference was a screenshot from Peter‘s video. I don‘t know from which film the photograph is and I don‘t know in what kind of construction the scene takes place. Maybe inside a tunnel, a plane maybe?
screenshot from Peter McKinnon’s video showing Jeff Bridges’ photograph
the process
This screenshot, my reference for my work, was the starting point for my analysis. What story was told, why was it so intriguing to me? How did light and shadow play along? How was the camera placed? What details in this very dark photographs were visible? What was the composition? And why – again – was it so appealing to me?
materials used
What I needed was this tunnel, a set of miniatures and proper lighting. Lighting and miniatures were already at hand. Lighting because it‘s part of my setup. Miniatures because I had a set of kitbashed and painted miniatures with which I wanted to create something anyhow.
Leaving me with the tunnel which I had to craft. The original photograph by Jeff Bridges does not have any light sources within the tunnel. But for my interpretation I wanted them. That‘s why I‘ve added an LED strip to the tunnel ceiling.
The miniatures I wanted to be part of my work are 3D printed miniatures designed by Reconquer Designs and plastic miniature designed by Games Workshop. All of them I‘ve modified and kitbashed so that they fit into my Knights of Embersworn setting. To be able to place the miniatures properly I‘ve replaced their bases with needle tips so that I can easily push them into the floor made out of xps foam.
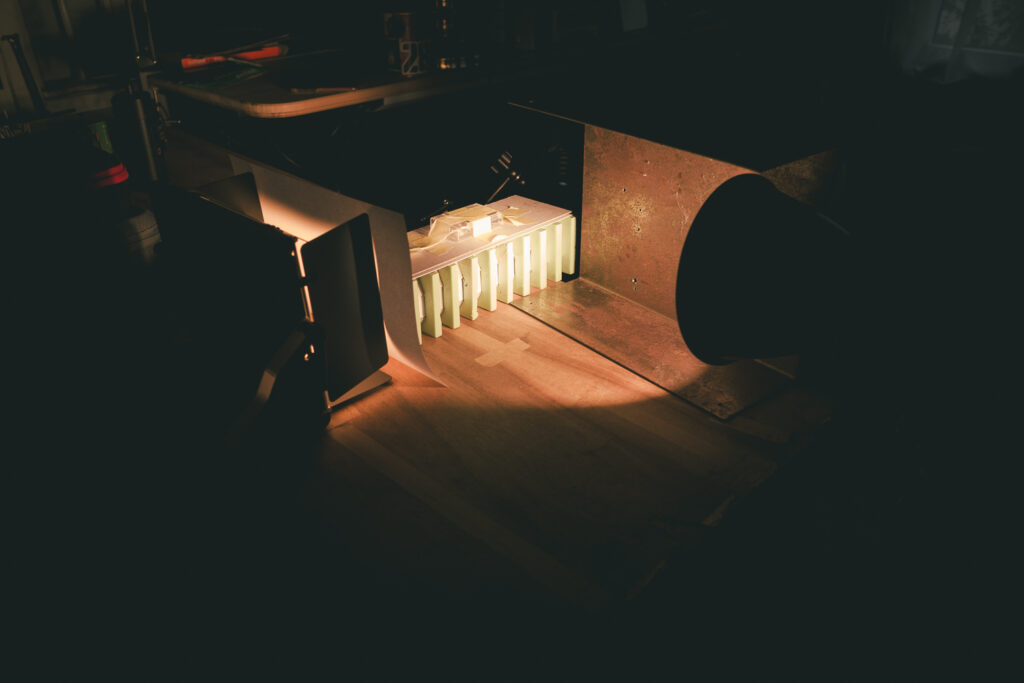
The tunnel I’ve crafted out of cardboard, xps foam and an LED strip. With cardboard I’ve created the walls and the ceiling and their details. The floor and the beams to hold the structure are made out of xps foam. The windows are just a plain white 80g/m2 printer paper. The paint job is straight forward using cheap black, brown and terracotta acrylic paint from the hardware store which I put on with a sponge.
a quick test shot
In order to be able to place the miniatures easily the ceiling and the walls are not glued together. And yet I had to make sure that there‘s no gap letting through any light from the side.
the photo setup
The original photograph by Jeff Bridges has two light sources. On the left side there‘s light coming in through windows. From the rear of the tunnel-like construction. I‘ve made test setups with whatever I had at hand but it quickly became clear that I wanted to add the ceiling lights.
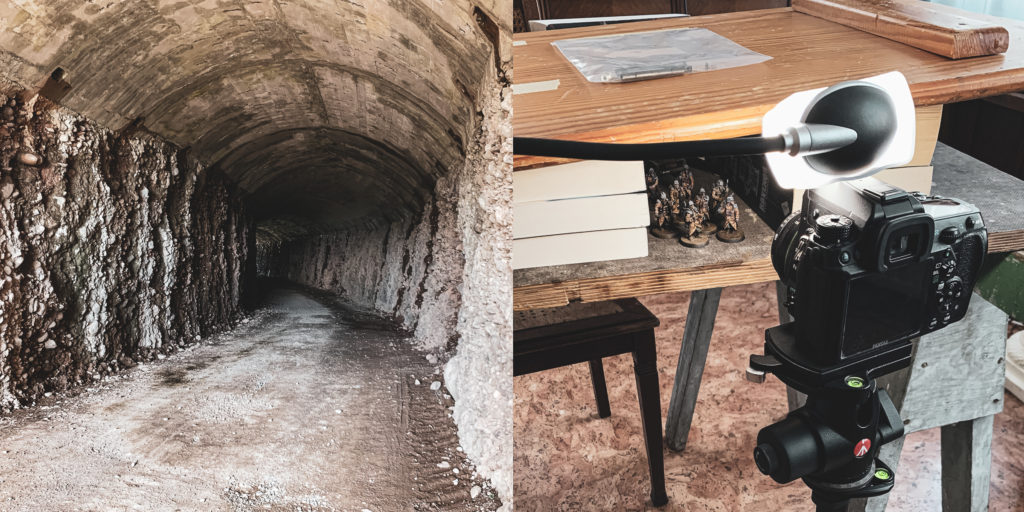
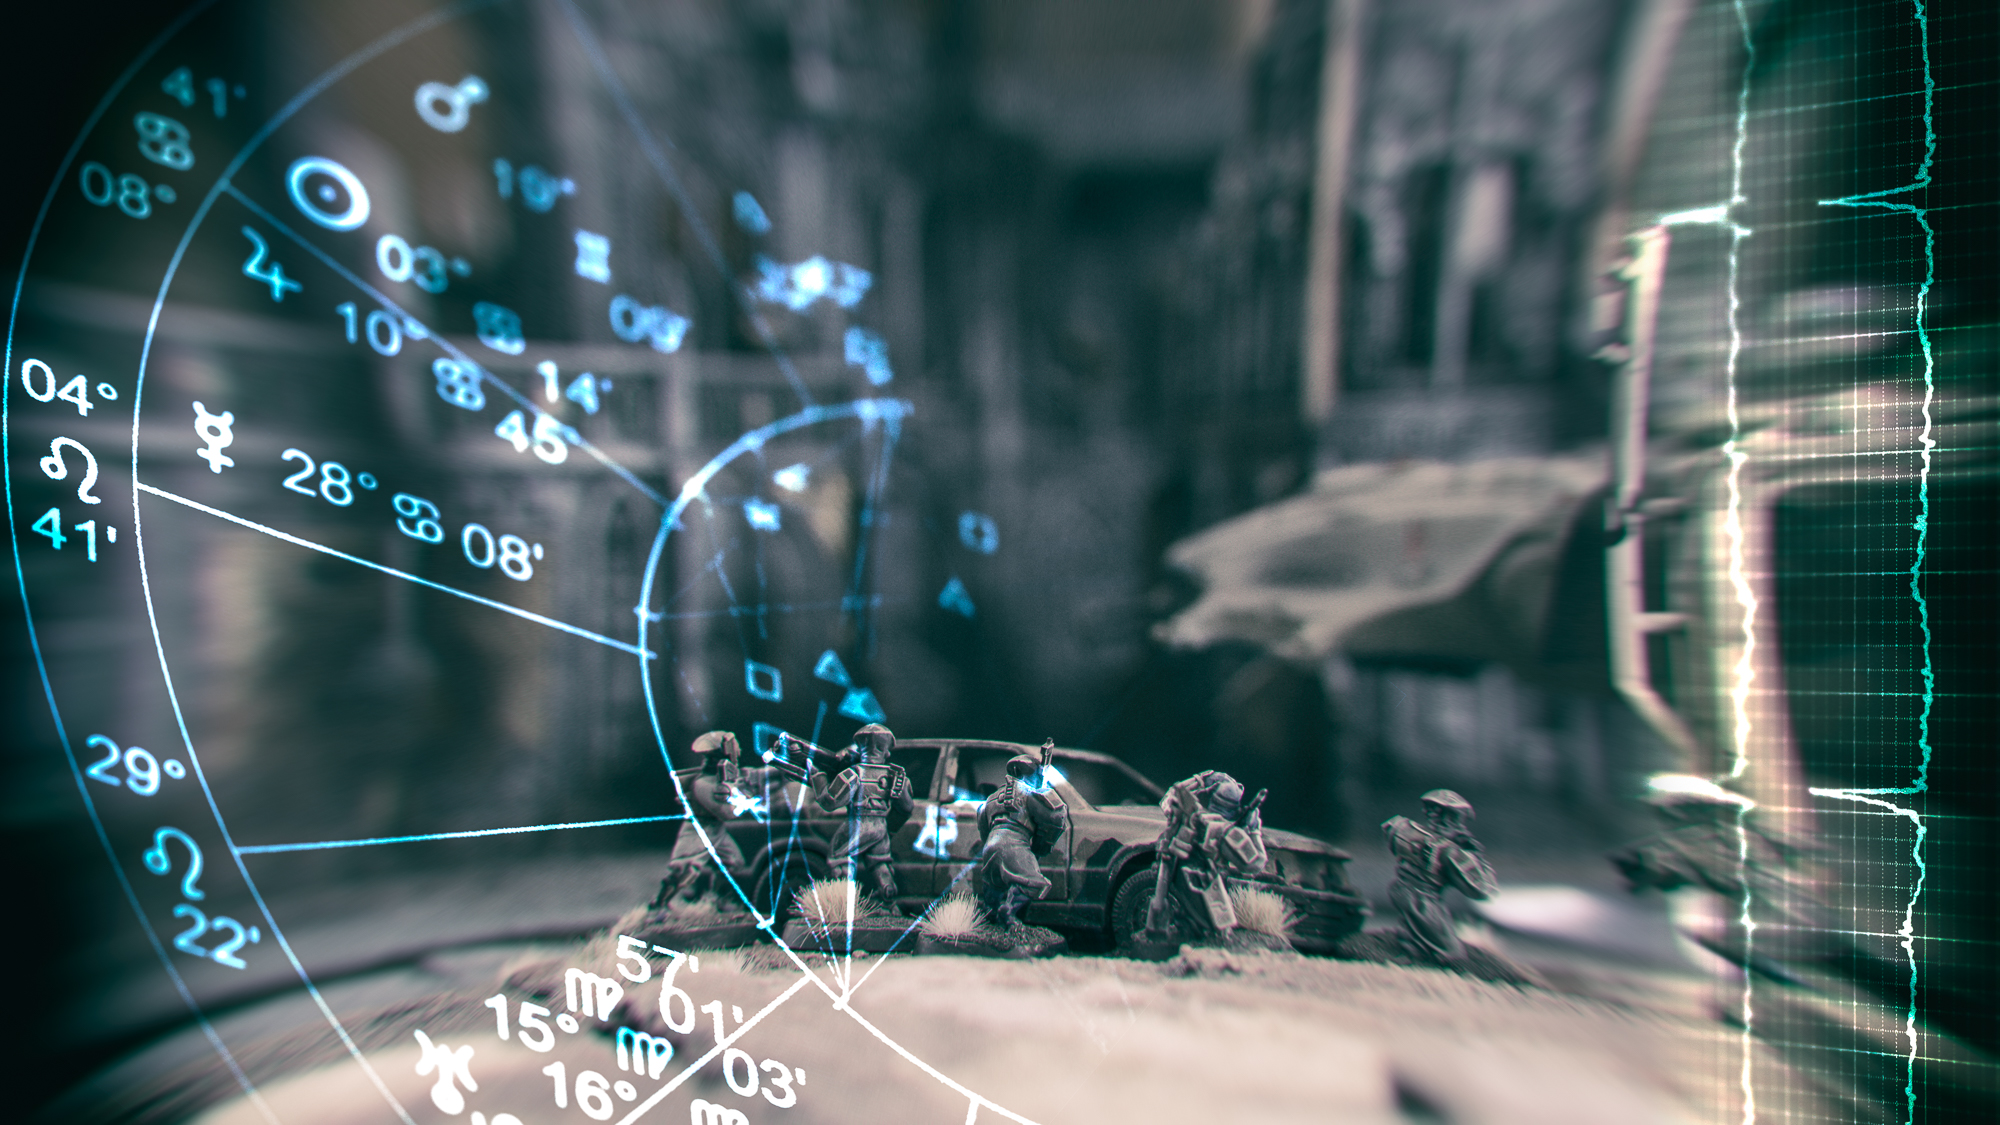
miniatures in a test setup for the tunnel
The paper window needed a strong light source from the left. Here I‘ve set up my amaran 200x from aputure. The rear light didn‘t need to be that strong. My LUMIS LED Panel 600 RGB from Rollei was sufficient. Still I had to diffuse its light with another plain white paper. I didn‘0t want the rear light to as strong as in the original.
After a couple of test photos it was clear that I wanted to emphasize the foreground a bit more for which I placed an additional spot.
As I don‘t have a Widelux camera and I doubt that it is useful for miniature photography I used my laowa 18mm probe lense.
The most challenging part was to trigger the camera shutter at the right time when the fog was distributed in the most fitting way.
post processing
In Adobe Lightroom I changed to a 16:9 ratio. The Widelux of course must have a ration 2:1 or 3:1. But I did not necessarily try to replicate the Widelux style but create an interpretation of the original with what I have.
Also I‘ve adjusted the lighting slightly with a couple of masks.
The result I‘ve processed in Nik Silver Efex for a proper Ilford hp5 plus 400 analogue film style.
In Adobe I‘ve added some subtle haze to the scene.
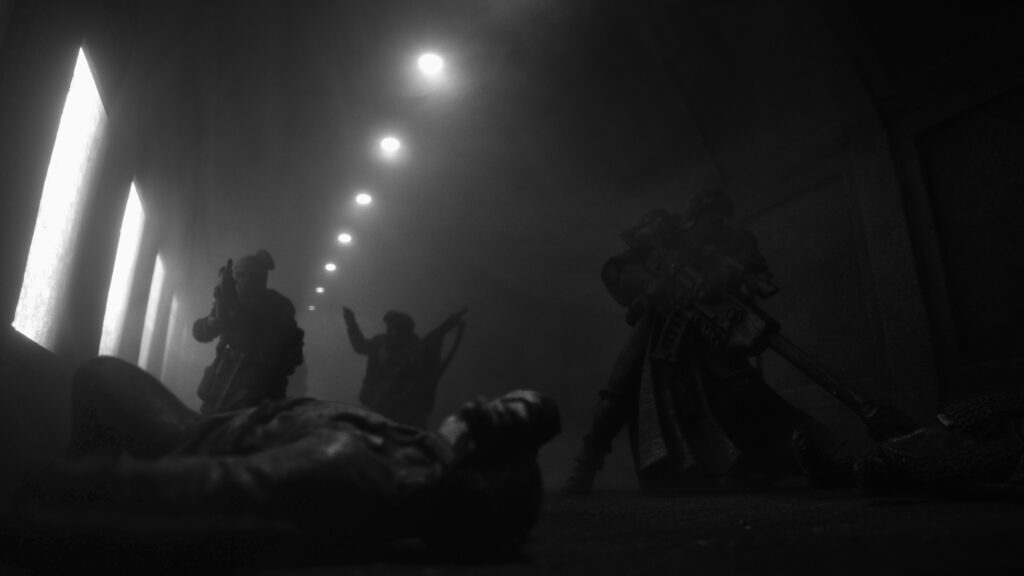
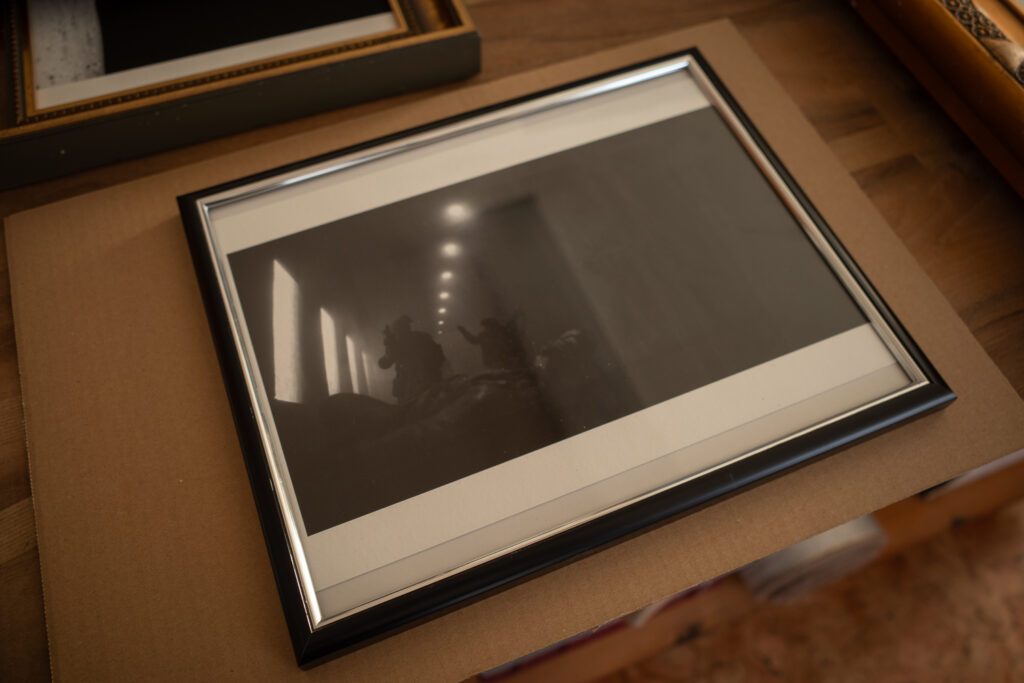
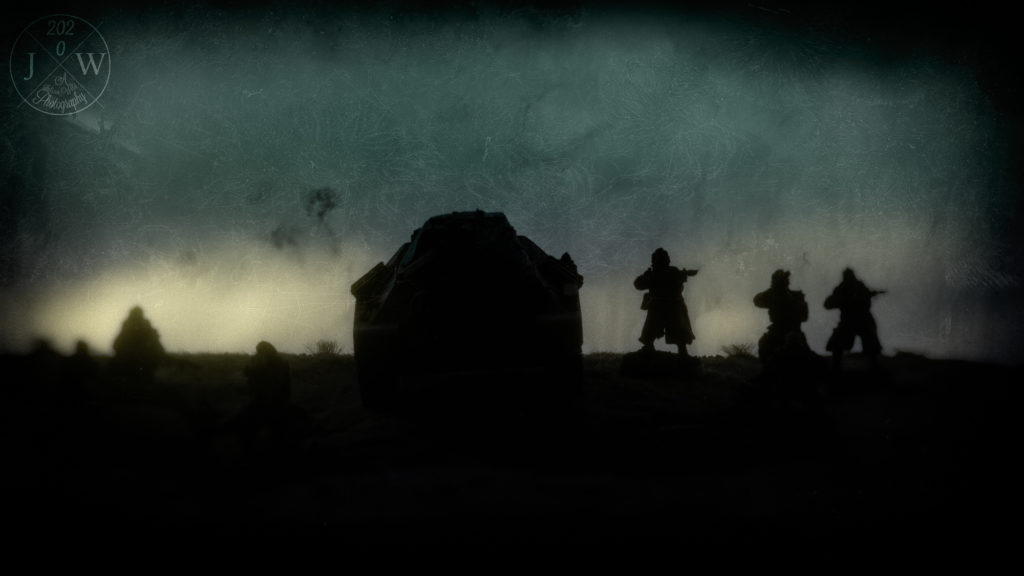
the result
The Tunnel
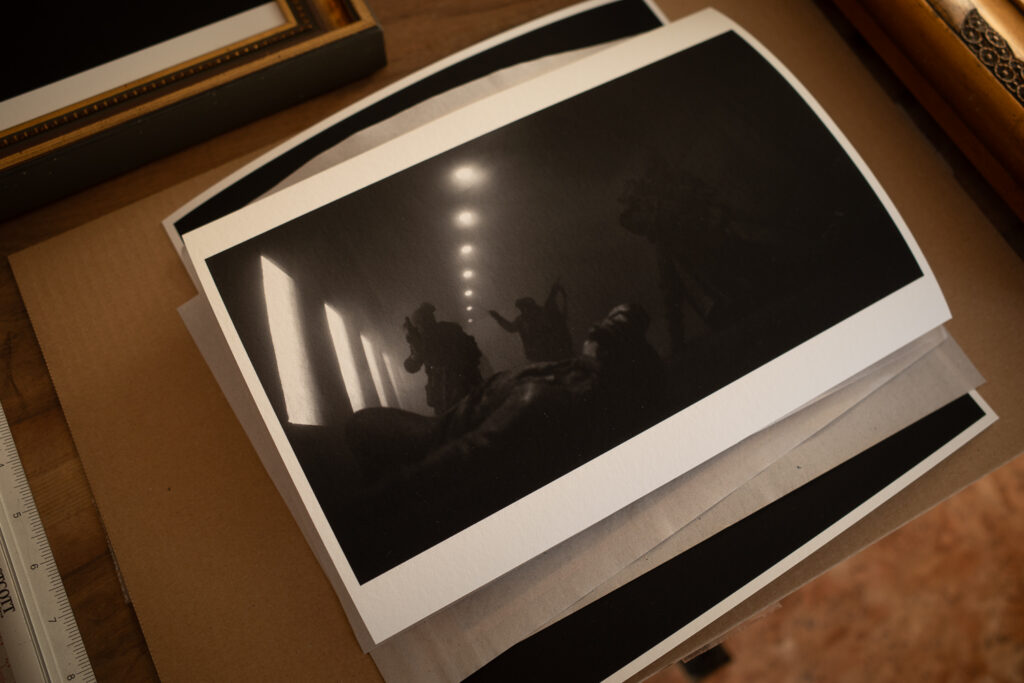
Printed on Hahnemühle Museum Etching fine art paper. This is the best way to enjoy such pieces or art.
the story in the photo
When she entered the tunnel with her retinue she already knew that the recon team had been overwhelmed. How badly was to be found out. The fog was dampening down the food steps on the cold floor. Slowly the went inside. A moan. A slowly raised hand, reaching for help.
This work is set in a dystopian world with the Knights of Embersworn being just one of many factions. If you want to see more related works please read my other posts for Transcendent Decay.
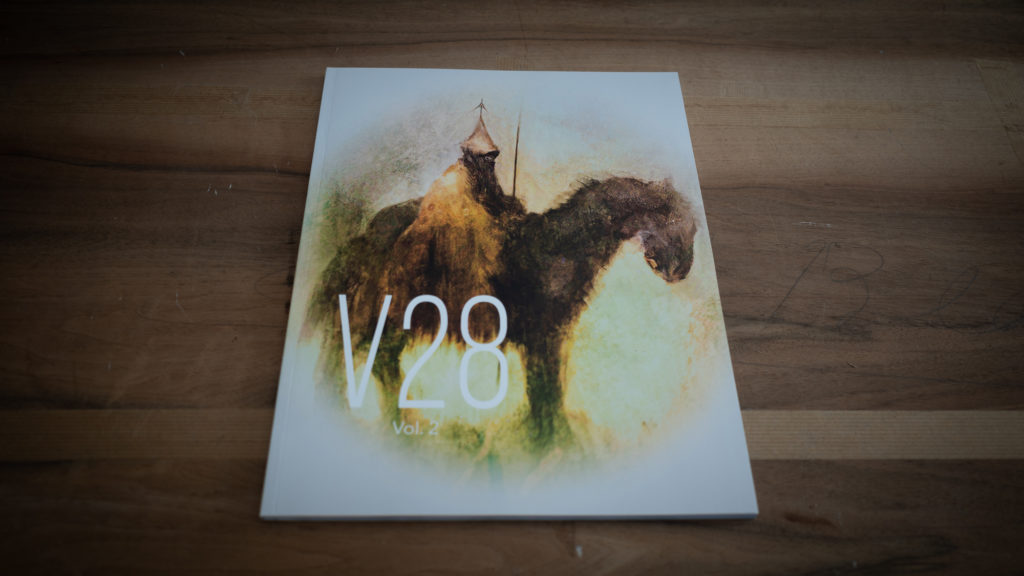
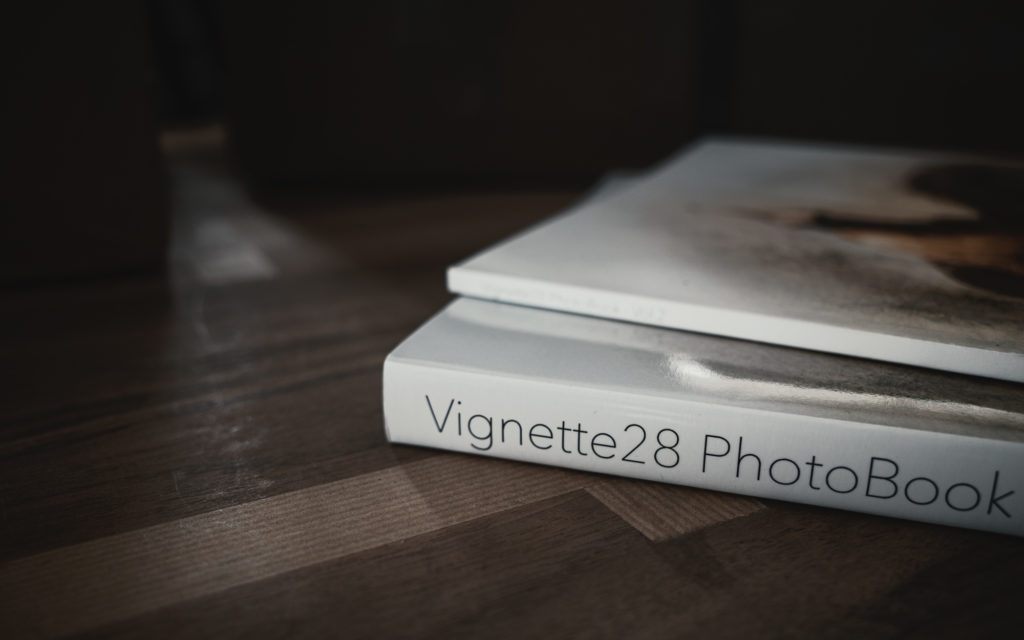
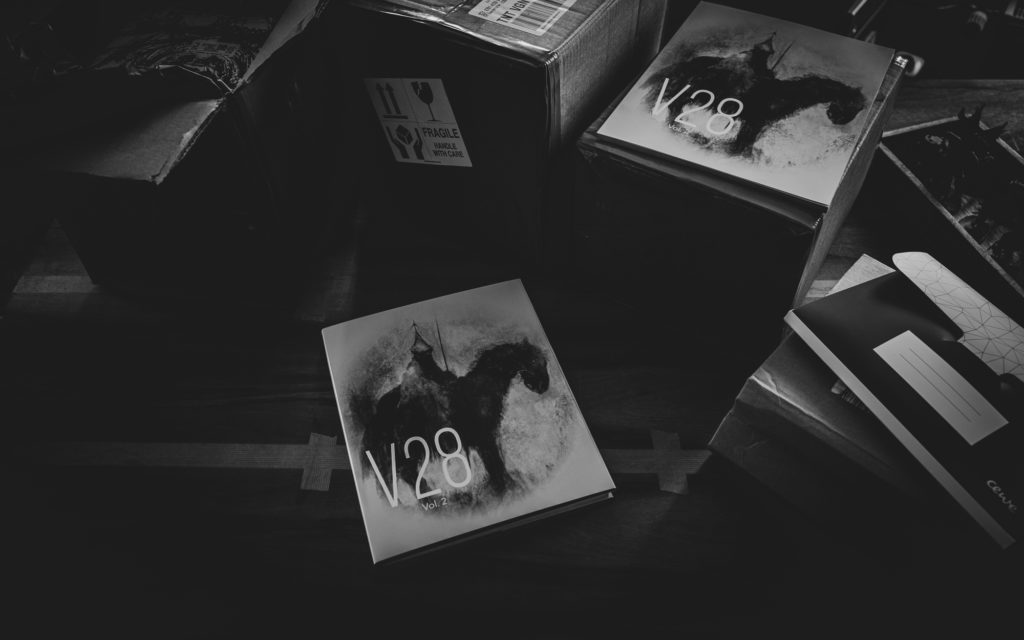
With the help and support of a lot of creators and creatives we managed to release volume 2. The Vignette28 PhotoBook Vol 2 – now available as free pdf (download, ca 100mb). Thank you to everyone who was part of this undertaking and who supported the release.
Cover of the printed version. Cover art by Jan Závěšický @icono.cybernetica
Here’s some stats:
We have some 40 creators, who entered up to three of their works.
Volume 2 has over 100 pages of awesome Vignette28s.
Once again that has been a challenging project and I’m happy that – despite a lot happening in 2022 – I can finally call it done. The Kickstarter rewards have mostly arrived, all backers had early access to the pdf. Now it’s time for you to enjoy this great collection of Vignette28 artworks from creators and creatives from all over the world.
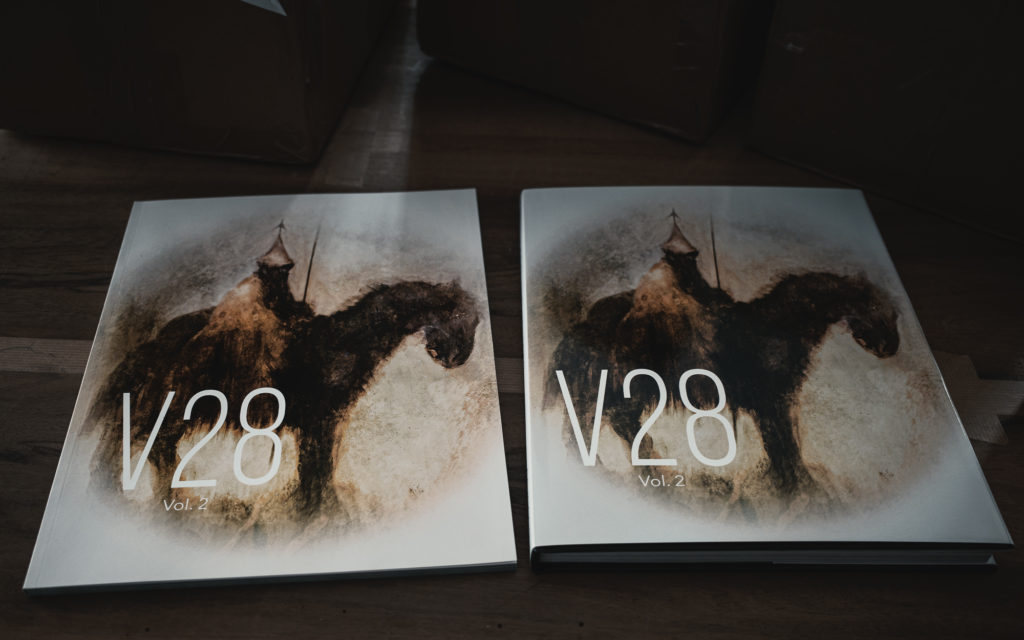
The Kickstarter included two versions (the now available print and a deluxe edition).The high quality print (left) and the deluxe edition (right).One of the amazing entries by Frederic Faulhaber @a.tale.of.grimdarkPreparing the shipment of the Kickstarter rewards.
Finally one remark on the deluxe edition: the deluxe edition was only available as a limited Kickstarter reward.
Combining miniature and landscape is a multi-step process which starts with the landscape, not the miniature. This guide uses an SLR and Photoshop and is my way of approaching the combination of miniature and landscape. For sure there’s other and more efficient ways.
Some of my landscape photos are actually smartphone pics. That’s because the best fitting camera for a pic is the one you have at hand – and that’s more likely with my smartphone camera. If that’s the case for you as well, all the given steps still apply. If you are taking pictures of your miniature with a smartphone as well, you might have less control over the camera settings.
How to Combine Miniature and Landscape
Quick Guide
Choose Background Pic
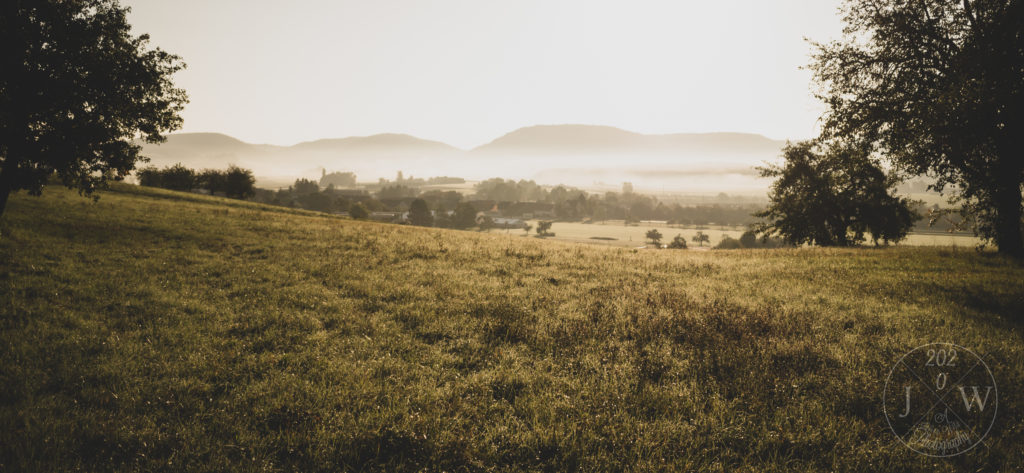
Before you take the photo of your miniature, be sure which landscape photo you want to have a background. If you have none yet, go out and make one. Make sure to choose your eye-level and a horizontal view. Make sure that you can see the foreground in the picture. It also helps if the foreground is flat for a certain distance (like a street, field or place).
Analyze the Background Pic
Once you’ve chosen your landscape (or cityscape) photo, start to analyze it. The following parameters are of interest.
Where is the sun coming from? What’s the angle, is it behind, in front of you or on your side?
How bright is the sun shining? Are the shadows sharp or blurry? Is it cloudy or blue sky? Is it rainy or foggy?
Choose your background pic first and analyze it second.
In this landscape the sun is shining very bright and directly from the front.
Setting the Stage for your Miniature
Place your miniature on a table (or any flat surface). You might want to choose its color as well, but that’s secondary. If there’s any buildings or walls or ceilings in the background pic, re-build them with any CDs, DVDs (oh, good old times), books, boxes, what have you. This helps you to have similar shadows on your miniature naturally. That means less editing with the brush later.
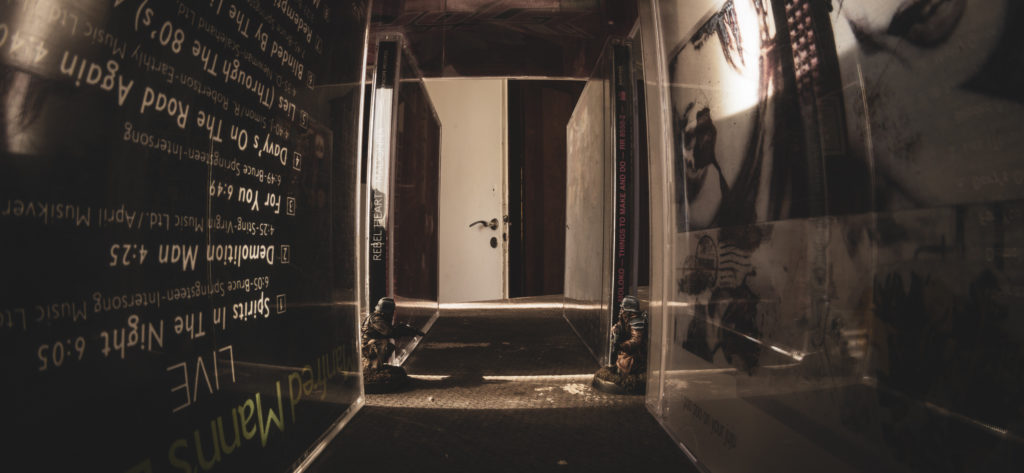
For the picture where two Death Korps of Krieg Infantery men kneel opposite of each other in a long corridor, I re-build the corridor and the door openings with several CDs. This way I had both the correct lighting and knew how to apply shadows on the floor if necessary.
These two kneel in two door openings facing down a long corridor of CDs.
Setting the Light
Now it’s time to bring light to your miniature. You need to simulate the same light as in the background pic. According to angle and brightness. For cloudy skies or fog be sure to have an optical diffuser at hand. Make also use of a permanent light source, rather than flash light. If you want to use flash light, be sure you know what you do.
Background pic (left) and miniature and lighting setup (right).
Choose a small aperture (i.e. a high f-value). This helps you to have as much of the miniature as possible in focus. In your landscape photo you might have a different aperture. But that’s ok because the field of depth in the far distance is less critical.
If possible, choose the same ISO value in both pictures. This way the grain level and distortion is the same.
Choose a shutter time fitting the aperture and ISO values (in case you shoot on M). No worries if the shutter is open longer than 1/60s, because your stabilization is already perfect.
I also save photos in the RAW format rather than jpg.
Editing your Photos in Photoshop – Combining Miniature and Landscape
Now let’s start combining the miniature and the landscape pics. Normally I do post-processing in Lightroom before I start editing in Photoshop – but I leave that for now (or a future post).
In Photoshop place both pictures in one image as separate layers (the mini pic on top).
Create a mask layer on the miniature. Mask everything but the miniature. How-tos you’ll find on youtube and Adobe’s support page.
Place the miniature within the background. Scale it down if necessary. Don’t scale it up due to loss of quality.
That’s it in a quick wrap-up for combining miniature and landscape in one pic. Of course you can have many steps in-between above steps. For example post-processing with Lightroom. More post-processing in Photoshop.
How to continue?
Multiple miniatures – advanced
When you want to place multiple miniatures in the photo be aware of your lens’ field of depth. If you have unfocused areas in a miniature think of taking multiple pictures. In each picture choose a different miniature to set the focus to. Let me know if you want to learn more about it.
Create a Perspective Grid – advanced
Photoshop makes it easy to create a perspective grid and figure out where in your landscape the horizon is. But it needs some free transformation of the landscape before that works. If you want to know more about that, please let me know as well.
In order to tell a story with a miniature in a picture there’s some minor but game-changing details to keep in mind. That is, to tell a story go on eye-level with your miniature. If you just want to showcase your miniature the Games Workshop Photography Guide is perfect. It has also some good explanations of the field of depth which are a good-to-know.
The Story Telling Point of View
A story does not focus on how well you painted your model. The story expects the paint job to be decent enough. And the story seems smoother if the model fits into the setting. If it blends in. In showcasing you choose a background and lighting to highlight your paint job. In a story the picture itself is the work, the output, which then results in an outcome for the audience. And the outcome is what you are interested in as a story teller. It’s what your audience takes away.
The Relationship between Viewer and Miniature
Start with creating a relationship between viewer and miniature(s). For that go on eye-level with the miniature. Place the camera horizontally and adjust the height of the tripod (or any stabilizing tool) so that the middle of the lens is on eye-level. The effect you achieve is that the surroundings of the miniature in the picture is seen by the viewer like the miniature would see it.
The Relationship between Viewer and Surroundings
Why is the change of perspective so important? When taking pictures of your friends, you normally don’t change your stance. Normally you shoot from your eye-level. The same often applies when taking pictures of your tabletop battle. So by showing pictures of tabletop games from an elevated angle the viewers see a tabletop game. But what happens if you change the perspective and go down on eye-level of the battle’s opponents? The viewer is suddenly in the middle of the fight. And loses the overview over the battlefield.
Going on eye level with the miniatures.
The Relationship between Miniatures
Now go one step further. If you have multiple models in the picture, especially with different heights (e.g. a human sized model and a Space Marine or tank) go on eye-level with the model the viewer will best relate to. Set the eye-level to the human sized model. This way – especially for bigger models – they are shown as they really would.
Choose with which miniature to go on eye level.
Summary
Tell a story by going on eye-level with miniature. Bring your camera on eye-level with a human-sized miniature. The change of perspective let’s you bring the real point of view into the world of miniatures.
Manage Cookie Consent
We use cookies to optimize our website and our service.
Functional
Always active
The technical storage or access is strictly necessary for the legitimate purpose of enabling the use of a specific service explicitly requested by the subscriber or user, or for the sole purpose of carrying out the transmission of a communication over an electronic communications network.
Preferences
The technical storage or access is necessary for the legitimate purpose of storing preferences that are not requested by the subscriber or user.
Statistics
The technical storage or access that is used exclusively for statistical purposes.The technical storage or access that is used exclusively for anonymous statistical purposes. Without a subpoena, voluntary compliance on the part of your Internet Service Provider, or additional records from a third party, information stored or retrieved for this purpose alone cannot usually be used to identify you.
Marketing
The technical storage or access is required to create user profiles to send advertising, or to track the user on a website or across several websites for similar marketing purposes.